Monday, 29 July 2013

A quick messenger bag

Hello fellow bissums,

sorry for the radio silence. What with it being a glorious Scottish summer and all I've been out in the garden watching nature do it's thing. I've also been sunning myself in Venice for a week and nourished my creative soul and satisfied my desire to eat gelato for seven days on the run.

Anyway while I was in the Veneto, it struck me that the tea towel is surely one of the most ubiquitous of holiday souvenirs. It's a daily reminder of cheery times spent with people you love in (hopefully) unforgettable destinations. But eventually, the poor wee thing gets washed out and stained with lord knows what in the quest to keep your kitchen tidy. What if there was a way to combine everything that is functional and practical about the humble tea towel, with a stylish reminder of good times had on holidays I pondered?

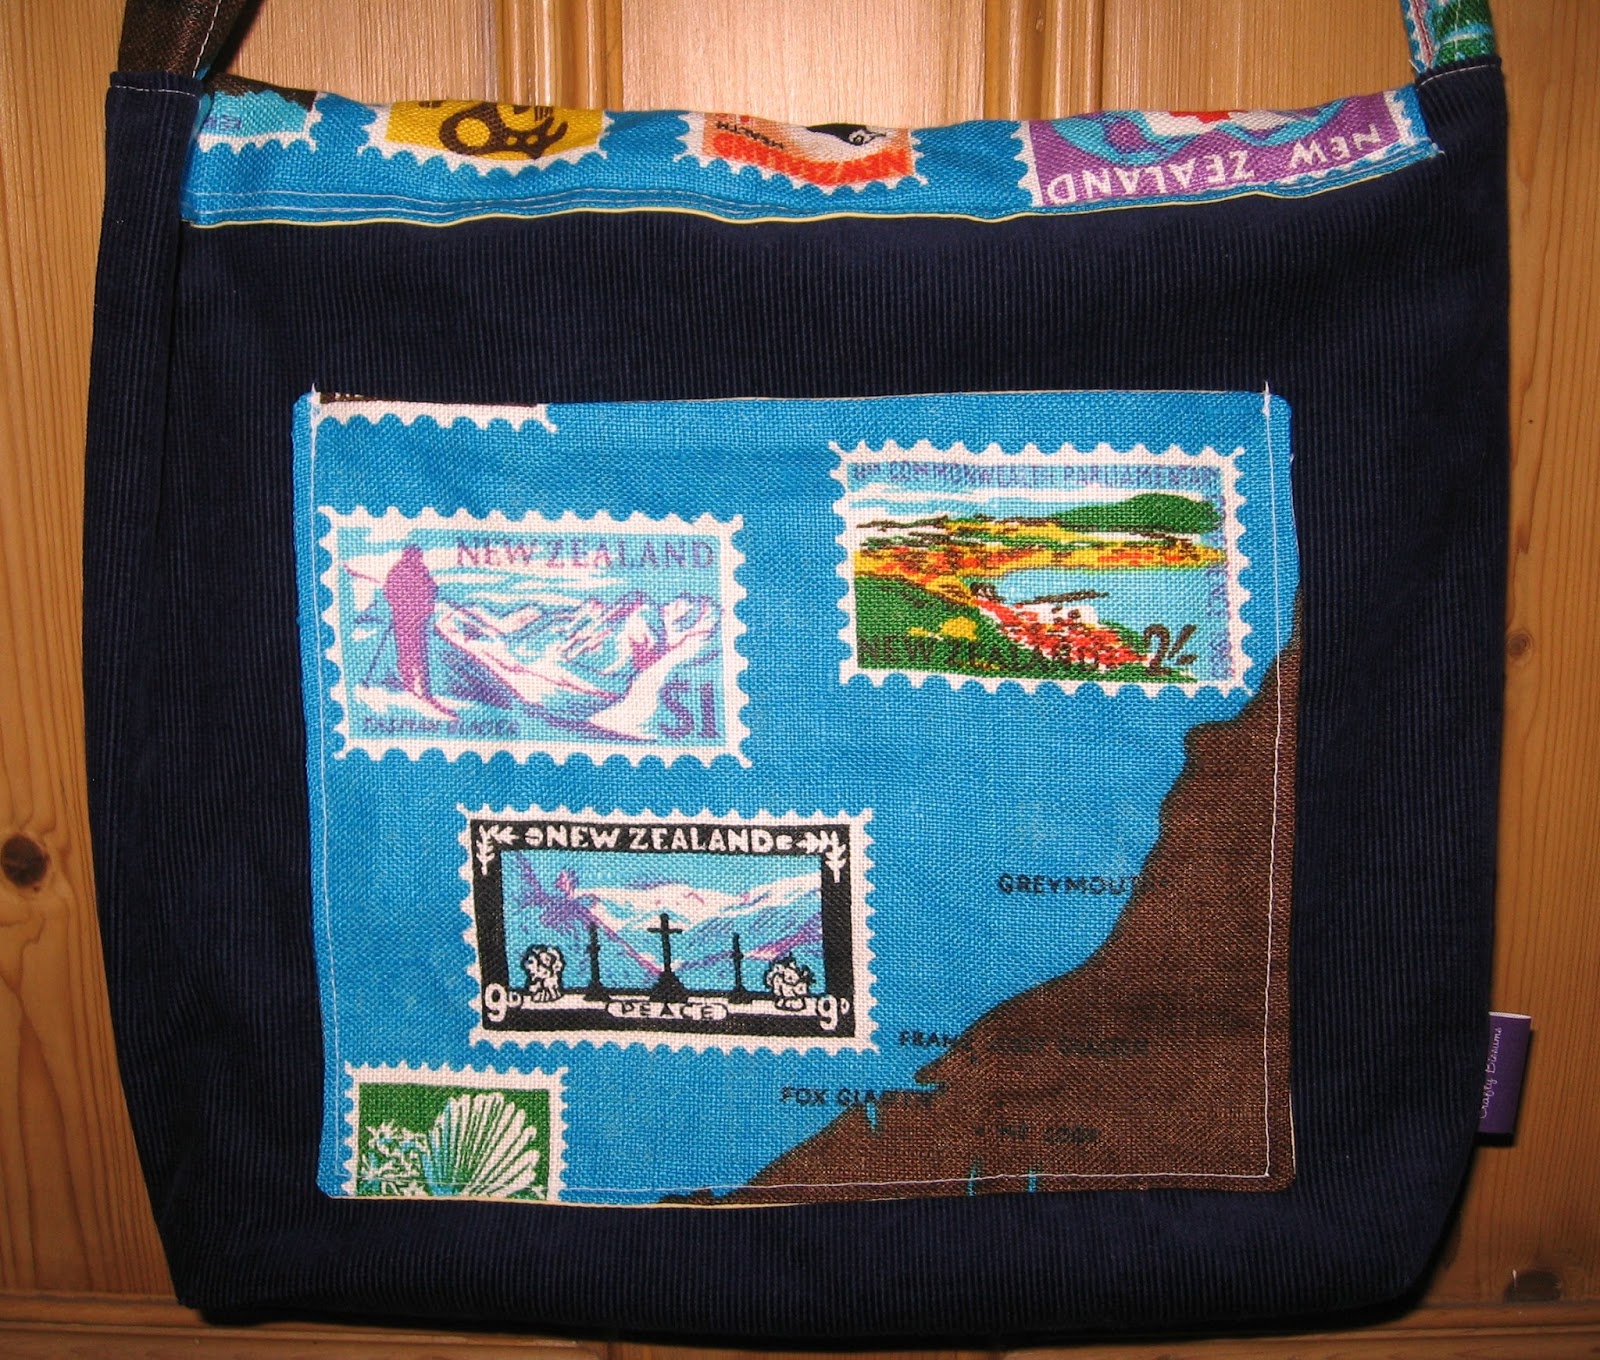
I've had a little habit going for a while now of sorting through piles of tea towels in thrift shops and choosing the best ones to take home to add to my fabric family. I like to take a moment and imagine who purchased each one and how they felt about being in their chosen destination. Or perhaps it was an unwanted gift for someone who wasn't lucky enough to be at said destination. In any case my collection has grown steadily. I was most thrilled to find one of the old school calendar tea towels from the year I was born and some from the part of Scotland in which I now reside. I chose however, for this remake, to use a gorgeous tea towel from New Zealand, my home country which had a pretty collection of stamp images and a map of NZ. I should have taken a snap of her in her original glory before snipping her up.

Handy outside pocket on the back of the bag

Another handy little inside pocket
Anyway, after a little googling I came across a fab tutorial for a simple messenger bag and thought it was the very thing for my project. I used an old pillow case for the lining and a salvaged piece of navy corduroy for the main fabric. It was quick and simple to stitch up, no fastenings or zippers here. Next time you're thinking about ditching a pile of old tea towels think again and get thee to thy sewing machine pronto (like the way I casually dropped in some Italian lingo there?)!
xx


Wednesday, 26 June 2013

Sorbetto anyone?


Hello summer people!
With the warmer weather coming on (and going it has to be said) what better time is there for whipping up a quick and cute summer top? There's so much good will in the online sewing community which has meant there are some fabulous free pattern downloads available. One of the better ones comes from Colette in the form of the Sorbetto. Once you've cut out and stick-taped all the pattern pieces together it couldn't be quicker to sew one up.

I had a crack at this recently using some fabric from a thrifted bed sheet and some old bias binding I had lying around. The cost is probably less than 50p! Because the fabric is pretty busy I didn't add any embellishments this time. It's a very simple construction with no zips or buttons and just two bust darts along with the pleat down the front.

What would I do differently I hear you ask? I'd add about 10cm on to the bottom because this is almost too short for me to wear comfortably. I think it would be easy to re-draft this pattern into a dress by adding some length at the bottom and flaring it slightly. There's no end of images on Pinterest, Flickr and the like of variations on this classic design. I might even have another go at a new version tonight!

Thursday, 13 June 2013

Summer lovin'

Months of bleak grey skies and constant snow can sometimes make one think summer's don't exist in Scotland. Then you wake up one morning and there's been a definite change. The grass has started growing at a rate of knots and brave little flowers are poking their heads above ground. The last few weeks have meant generally glorious weather and I'm resolved yet again to hold on to the memories of all this loveliness when summer has passed.

As well as enjoying early morning cups of tea in the garden I've finally gotten around to making my doll face cushion. I've had this project in mind for many months now and can't believe I dragged my heels for so long. You could honestly whip this up in one night and I have a sneaky feeling more of these cuties will be popping up around the house in future. This little gal needs a guy to keep her company I think.


If you're in the mood to make one yourself here's some simple steps to follow.
  1. Trace a circle using your old school compass (if you still have it) onto a piece of paper making the diameter match your cushion pad. Add a small seam allowance but not too much, you want a nice snug fit. Cut out.
  2. Use the paper circle as a pattern to cut out one patterned piece of fabric (this will be the back of your cushion) and one plain piece (this will be the front face).
  3. Now using your paper circle, draw on the lips, cheeks and hair with pencil. Cut out each piece and use as a pattern to cut out on your chosen fabrics. I think it's fun to go a bit wild with the hair fabric and choose pinks and reds for the lips and cheeks.
  4. Pin the fabric face pieces to your front face circle and using a small zig zag stitch sew them on, sewing right at the edges. You want your stitch to catch the raw edges and enclose them to prevent fraying.
  5. Now you need to add some eyes. I drew mine onto the fabric with a fading marker pen. Then I placed the fabric into an embroidery hoop and back-stitched over the top of my outline.
  6. Place your finished front face piece right sides together with your backing circle and sew all the way round the edge leaving a big enough gap to insert your cushion pad.
  7. Turn inside out, insert the cushion pad and slip stitch the opening closed.
  8. Voila and your cushion is done! 

Wednesday, 5 June 2013

Summer school excitement


Crafty Bissums are very excited to be attending this year's Folksy summer school in Sheffield. The program looks really excellent with lots of interactive workshops and presentations from some very inspirational people involved in Britain's craft scene.
Perhaps we'll see some of you there?
xx

Monday, 27 May 2013

Simplicity made complicated

I hope you're all having a wonderful long weekend wherever you are. In an almost unheard of run of good weather in Scotland there was blazing sunshine on two consecutive days! It was truly glorious on Saturday and Sunday and I made sure to spend as much time outside as possible. On Friday evening however, I was inside cutting out yet another dress pattern and today on Monday it was windy and rainy, hence perfect sewing weather. I know I'll be going back to work tomorrow feeling relaxed and refreshed and with a new addition to my wardrobe.

On a recent thrift store trawl with my fellow bissum Marion I happened upon an original 1974 Simplicity Pattern (number 6764) for a really simple and cute dress, I think it cost the princely sum of 50p. I say simple, and it mostly was, except for the fact that it would require me to climb my own personal sewing Everest: putting in sleeves *pause for dramatic gasp*. I would be lying if I didn't say there was a fair number of curse words being used at the point of easing the sleeves in (by the way, the use of the word 'easing' in connection with sewing sleeves is completely inappropriate and lulls the unsuspecting sewer into a false sense of relaxation and confidence). After a fair amount of unpicking and re-sewing the sleeves were eventually attached at I can proudly tick that off my first-time list.


I also decided to get clever by adding a peter pan collar to the dress and patch pockets. The air positively turned blue when I was attempting to attach the collar but as always, I got there in the end and I'm reasonably satisfied with the result. I drafted the collar pattern by using the two pattern pieces for the front and back neck facing and that way it fitted perfectly. It also meant I could skip attaching the neck facing.
My Cath Kidston collar

I drafted my own pattern for the pockets and used a decorative box stitch to attach them. I also varied the pattern by cutting the front piece on the fold rather than in two separate parts to avoid the join. After cutting the pattern out I realised it was far too long and lopped a good couple of inches off the bottom. You need to be a little careful if you're doing this on a dress with flare like mine was. Cutting straight across the bottom is a no-no. You need to keep a slight upward curve at the side seams.
My patch pocket
The thing I really liked about this pattern was the shaping. It has two bust darts at the front and at the back it has shoulder darts, along with two more in the middle of the back, either side of the zip. The main fabric is a super soft cotton in a sweet candy pink colour and came from an old bed sheet. The contrast fabric is from a piece of sacred and much-loved Cath Kidston fabric which my favourite Aunt Isabel bought for my birthday a couple of years ago. I'm such a tightwad when it comes to using it that thus far it's only been cut into for the smallest projects, like this collar. The pink in it perfectly matches the main fabric though so it was a good choice. I finished the collar with an old grey/blue button.
Overall I thoroughly enjoyed making this dress and would definitely attempt it again. I'd make the body slightly smaller next time though and make the pockets bigger. I'd also be tempted to place the zip at the side rather than down the back.

Happy crafting fellow bissums!
xx
Related Posts Plugin for WordPress, Blogger...